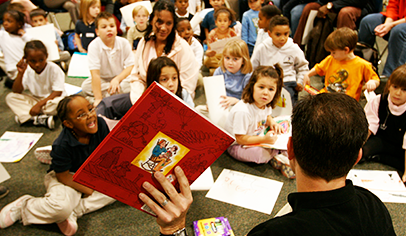


Four years ago, I became involved in what I think of as the most amazing program our PTO supports. It’s amazing because it has a small budget, it enables parents to work with classroom teachers to enhance the quality of their children’s education, the students love it, and the parents love it. The “it” I became involved in is an art appreciation program called Meet the Masters. It’s organized by our PTO’s art appreciation committee, which I cochair.
A program like this “can put more joy and more confidence into young people’s lives,” says Karen Cashman, who founded our art appreciation program here at Kings Road School, a K-6 elementary school in Madison, N.J. And she would know. Karen started the Kings Road program 18 years ago and has had college students write her thank-you notes saying they felt that they had an advantage over other students in their understanding of art and architecture. Another charter volunteer said of her daughter, who just graduated from college with an art history minor, “I truly believe her appreciation started here.”

Background and Objectives
The Kings Road School (KRS) art appreciation program was piloted in the 1985-86 school year, with the support of the PTO and the principal. The teachers, on the other hand, had some reservations about losing instruction time. Although that all changed when they saw the program in action, it is something to consider as you put your program together. Many states have developed rigorous curriculum standards. To be sure the teachers see your new art-appreciation program as supporting rather than stealing instructional time, you should include curriculum tie-in as one of the objectives.
The objectives of the KRS art appreciation program, now called Meet the Masters, are:
- To teach students how to look at, understand, appreciate, and be comfortable around art
- To arouse the interest and curiosity of students
- To increase visual literacy by expanding the children’s vocabulary and strengthening observation and communication skills
- To provide cross-curricular tie-ins where possible.
Connecting an artist to some other discipline should not be a daunting prospect. Even the loosest connection works, as these lesson titles prove: Marc Chagall Meets Martin Luther King Jr. (language arts and social studies); Monet and the Science of Light (science); Faith Ringgold Tells a Story and Fills a Square (social studies and geometry); Emily Carr Among the Peoples of the Pacific Northwest (social studies); Diego Velasquez and Pierre-Auguste Renoir: Compare and Contrast (language arts); and Joan Miro Goes to the Dogs: Visual Literacy (language arts).
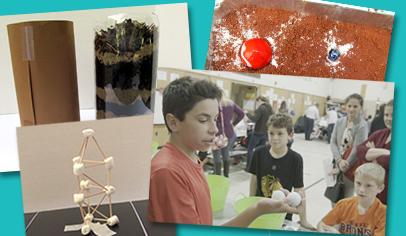
Each lesson has the same format: It begins with a discussion relevant to the artist and his work and ends with a related hands-on project. Perhaps my favorite lesson was the one on Faith Ringgold. I worked with the classroom teachers to plan two sessions rather than the single hour used for most topics. The first lesson tied into the social studies unit on the Civil War, slavery, and African-American heritage. We talked about how little the slaves were able to bring with them when they were taken from their homes in Africa: the clothes on their backs and their storytelling tradition. This tradition is a key element in Faith Ringgold’s art. Each student illustrated a story in his own life using oil pastels.
The second lesson tied into what the children were learning in geometry. During this lesson, the students created quilted borders for their “story quilts” using wallpaper pieces that had been cut into triangles, rectangles, and smaller squares.
I love the creative process of thinking of ways to link the art and artist to what the students are studying. This curriculum tie-in approach is something I stress with my volunteers.
The Way Things Work
To set up an art appreciation committee for your own parent group, make the committee fairly large. Two to four volunteers per grade level works well. With a committee that size, it’s a good idea to outline roles and responsibilities.
Our Meet the Masters program introduces students to three to six artists each year. Volunteers simply need to be enthusiastic about art. No experience or special knowledge of art history is required. Fine-art reproductions, lesson plans, and training are all available.
Volunteers are asked to present one or more artists at their grade level. The team of parent volunteers at each grade level works with classroom teachers on scheduling. Lessons are 30 to 60 minutes total: part discussion—the artist, his life and times, the painting, general art concepts—and part hands-on art project. Volunteers prepare a take-home sheet describing the lesson for students.
As far as time commitment, volunteers attend a one- to two-hour question-and-answer session for new members. They attend grade-level team meeting and planning sessions, and they help with the Meet the Masters Art Show and Ice Cream Social held each May. In addition, the lessons require planning time, prep time for gathering materials, and presentation time.
As chairman of the committee, I have to make sure we have volunteers. At the end of each school year, I ask each member of the committee whether they wish to teach next year and at which grade level.

Getting Started
If all of that sounds appealing, follow these four simple steps to make it happen for your school.
Get approval. Run the idea by your PTO president to determine whether there is any interest. Then follow your PTO’s bylaws to make a proposal and get the necessary approvals.
Select an art appreciation package. I have inherited a varied and wonderful program that was created by piecing together prints from various sources and conducting library research on each painting and artist. Today, there are canned art appreciation packages that come with teacher guides. To get your program off the ground quickly, you might want to compare art reproduction sets to find the best fit for your school’s curriculum. Some of the print sets are large enough to give you a complete package, while others are small enough to let you mix and match. And you can always add individual prints to the program later.
Get funding. Funding will come from your parent group, grants, or some combination of the two. Wherever the money comes from, you’ll need cost figures. Start-up costs include the art appreciation kit and art materials for the projects. Ongoing costs primarily involve the project supplies. If you do a year-end art show, you’ll need to buy construction paper for mounting the art, tape, and refreshments. Student award certificates can be printed on copy paper.
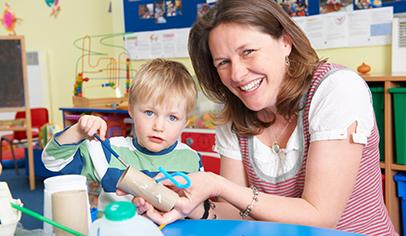
Put the program in place. Finally, get your group of volunteers together, plan your lessons, and have fun with it. This is the best kind of program to be involved in—one in which you directly influence the education of your child. And there are perks. Since I teach in my daughters’ grades, I know all of the kids at their grade levels. I also get greeted excitedly whenever I come into the school: “Do we have Meet the Masters today?!”
Hints and Tips
Here are some other ideas to help you get a successful program going:
- Start small. Buying an art appreciation package might give you more than you want to present for the first year. Try piloting with two artists at each grade level.
- Find storage space at the school. I know schools are packed to the limits, but try to find a place to store the art reproductions and the supplies. This central location will enable your volunteers to find what they need when they need it. Separate supplies for each grade level are a good idea to avoid a run on paint and brushes.
- If you buy any resource books, set up a check-out system so you can retrieve items that people have forgotten to return.
- Get donations of art materials. Local stores might be willing to donate or discount some supplies. We were able to get junk lumber from Home Depot so that the students could paint on wood as Pieter Brueghel did. I also got paper egg cartons from the local bagel shop.
- Ask parents to save junk: meat trays, corks, puzzle pieces, gift-wrap, and construction paper scraps. You’ll be able to use them all for something.
- Go to wallpaper and decorating stores and ask for discontinued books. You’ll have high-quality papers and fabrics to play with.
Sample Budget
Here’s a rough idea of what it might cost for a program of four artists per grade level in a K-6 school with about 350 students.
| First Year | |
|---|---|
| Shorewood School Museum Collection (50 prints) |
$750 |
| Basic materials (central supplies to be used for any project) |
$650 |
| Additional materials ($10 per project for the extras) |
$280 |
| Art show/Ice cream social | $130 |
| Total First Year Budget | $1,810 |
| Second Year | |
| Replenishment of basic materials | $140 |
| Additional project materials ($10 per project) |
$280 |
| Art show/Ice cream social | $150 |
| Total Second Year Budget | $570 |
Linda J. O’Gorman is an artist, craftsperson, and teacher of art appreciation. Her art programs for nursery and elementary school children stress diversity—different kinds of artists making art in different ways.
Originally posted in 2002 and updated regularly.